
In this topic, you will create the Service Account used at the FVTerm server(s) to manage user access based on Organizational Units and Groups.
This task is started at https://console.developers.google.com
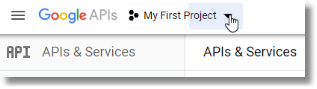
1.If your Project created in the previous sections is not active, at the Dashboard, Click on the Down Arrow next to the active Projects:
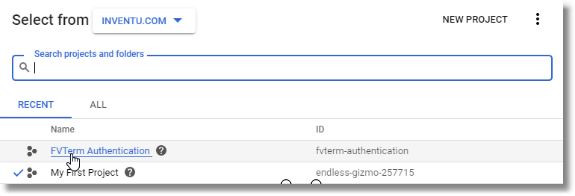
2.Next click on your project to edit its settings:
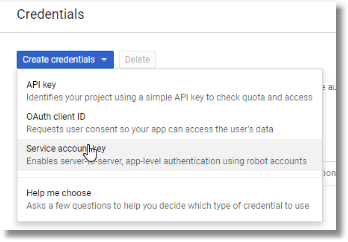
3.Click on Create Credentials - Service Account Key:
4.Select New Service Account and enter the name of the Service, for example, FVTerm Server and ignoring the Select a Role, Click Create:
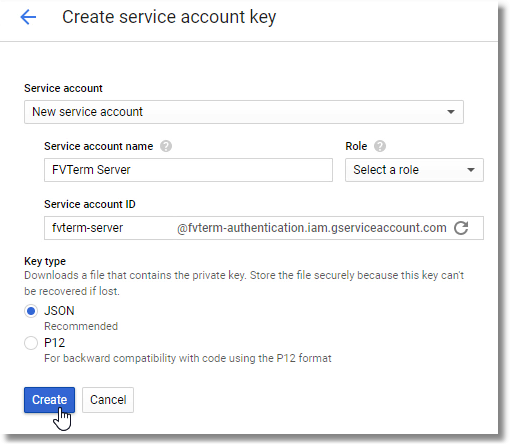
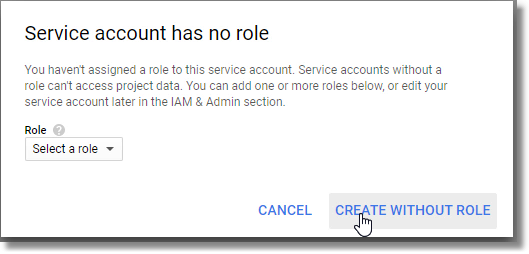
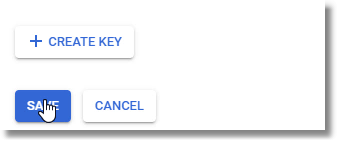
5.A pop-up will display warning about a lack of roles--not needed, click on Create Without a Role:
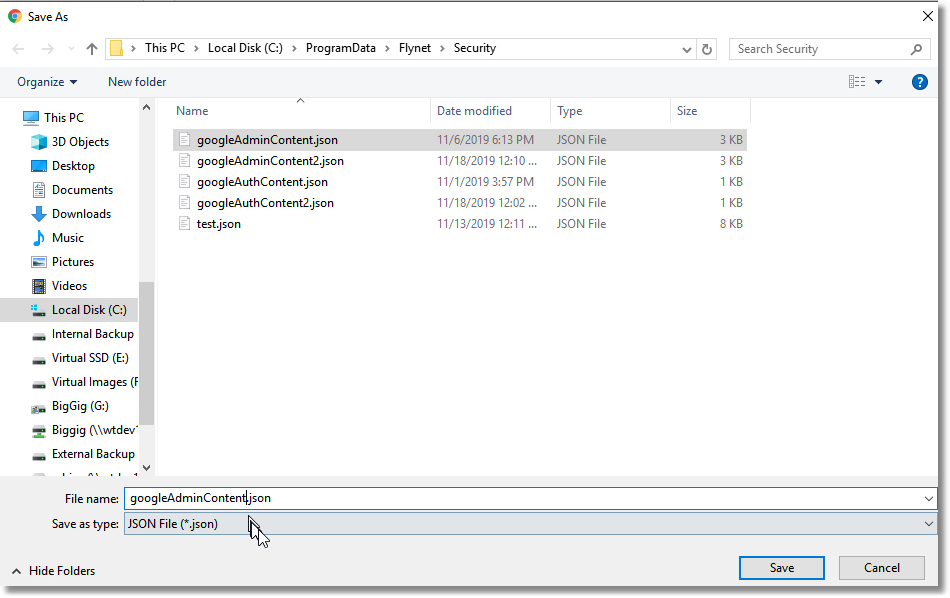
6.A File-Save Dialog for saving the Service Account details is displayed.
The default name for the JSON file as stored on the FVTerm server is googleAdminContent.json--and the default location is at c:\ProgramData\[Inventu|Flynet]\Security but if you are downloading on a PC or server that isn't the FVTerm server, save in a folder of your choice.
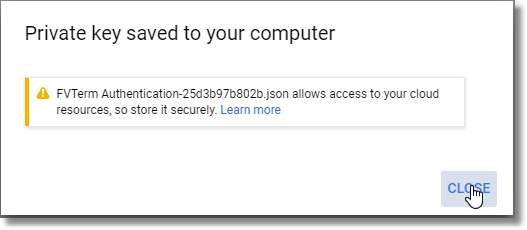
7.Complete the initial steps of Service Account Creation:
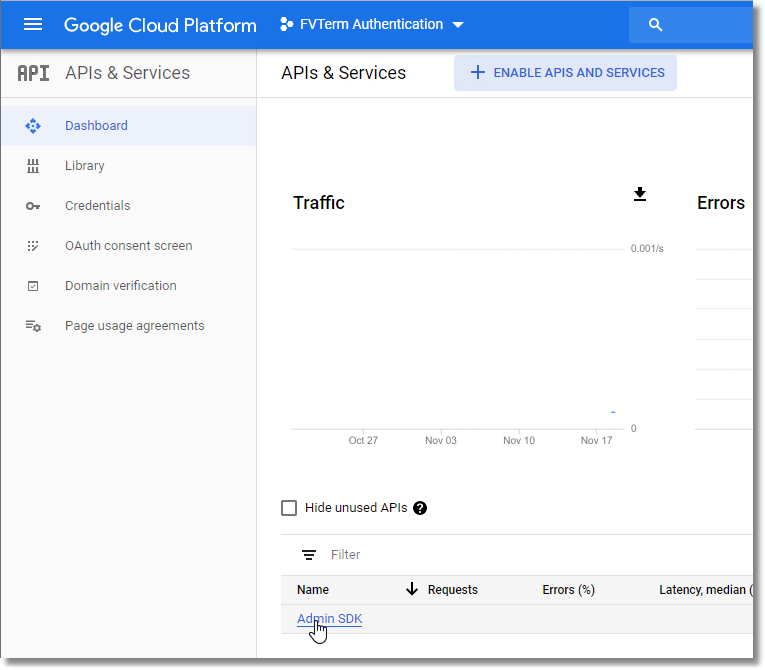
8.Next, the Service Account needs to be Setup to enable access to the Admin SDK API.
Please follow the next steps exactly as defined--at the time of this writing, access to the Service Account must be performed via the Console API's and Services / Dashboard / Admin SDK links to Enable Domain-Wide Delegation in Step 12...
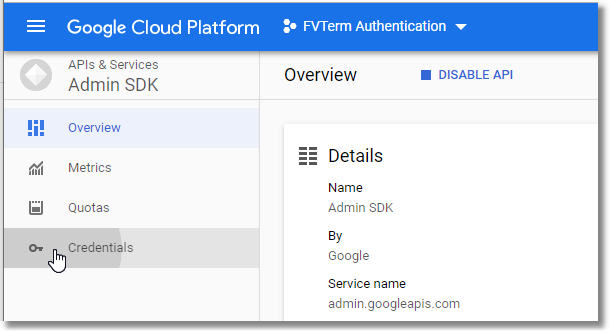
Click on Dashboard and then in the list of API's at the bottom click on the Admin SDK:
9.On the Admin SDK page click next on Credentials:
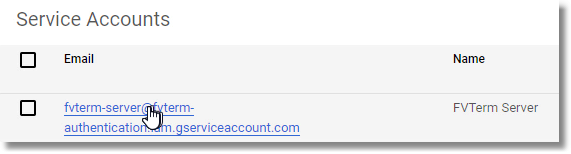
10. Now Click on the Service Account you created in Steps 1-7:
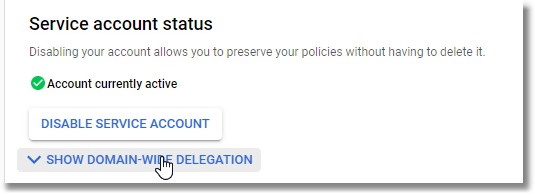
11. On the Service Account Details Page, click on the Show Domain Wide Delegation button:
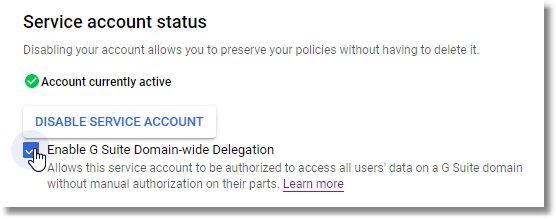
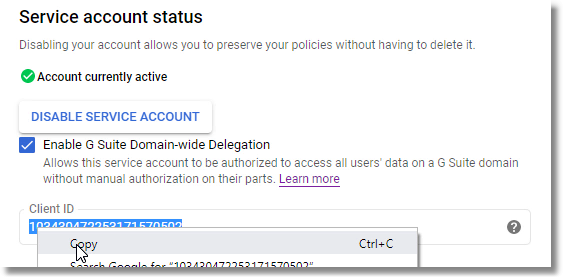
12. Check the Enable G Suite Domain-wide Delegation box and Save.
Note: the service account will be restricted to read-only access to directory information only in Step 17, in case this step causes you concern!
13. Now, repeat Steps 10 and 11, as there is a Client ID created in Step 12 that is needed for the next steps.
Highlight and copy the Client ID to the Clipboard:
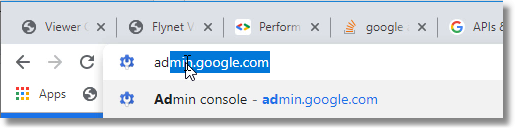
14. Go to https://admin.google.com in your browser:
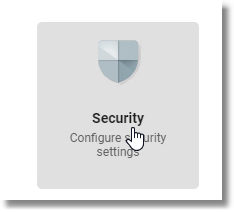
15. Click on the Security Icon:
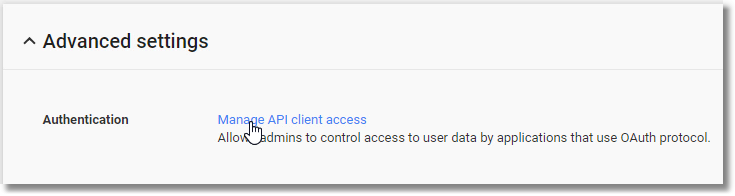
16. Scroll-down to Advanced Settings and Click on Manage API Client Access:
17. Paste the Client ID copied in Step 13 into the Client Name field and then copy and paste the following three API Scopes in the One or More API Scopes Field:
https://www.googleapis.com/auth/admin.directory.group.readonly,https://www.googleapis.com/auth/admin.directory.orgunit.readonly,https://www.googleapis.com/auth/admin.directory.user.readonly
Then Click on Authorize to Complete setup for the Service Account:

18. This completes the steps necessary to setup for FVTerm Google Authentication and Integration. Note that if, during testing, there are additional URL's that are needed, you can update the lists created in Step 8 of OAuth 2.0 ID For Client Sign-In without need to re-download either of the two JSON files created in this help.
