This example continues from the previous topic Setting Recognition Criteria. It requires that the screen be imported from the Workflow Recording.
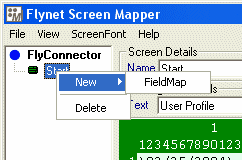
Right-click on the "Start" screen element and select the "FieldMap" option from the popup menu.

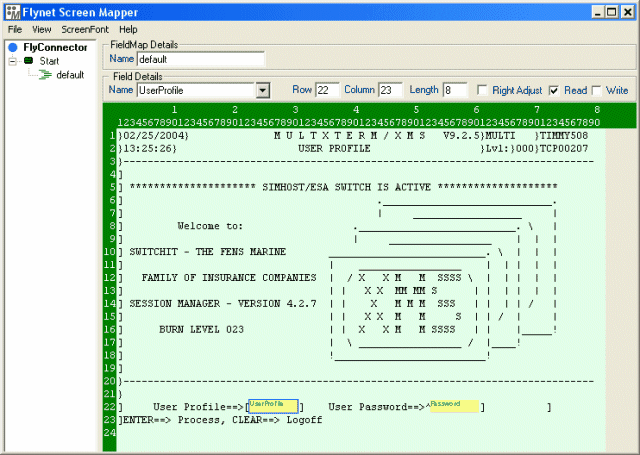
A field map allows for the definitions of fields on the screen. More than one field can belong to a field map.
To create a field, highlight the section of the screen that you want to map and assign it a name (e.g. below two fields have been defined; namely "UserProfile" and "Password"). These fields can be resized and moved by using the mouse. The fields can be deleted by right-clicking and selecting "Delete" from the popup menu.

It is these fields that greatly assist in the development process as they allow sections of the screen to be referred to by name. No longer does the developer have to hard code text locations into source code which would mean an edit and recompile would be required if the host screen ever changed. Instead, only the definition file would need to be modified by moving or resizing a field to match the new host screen layout.
To view the source for the generated definition file click on the "View/Text" menu option. This text can be manually edited, and will be reflected when switched back into the graphical mode. Switch back to the graphical mode by clicking the "View/Graphical" menu option.
<?xml version="1.0"?>
<FlyConnector application="ScreenRecog" version="1.0" Debug="no">
<Screen name="Start">
<Recognize Type="include" row="2" column="31" Text="USER PROFILE"/>
<Recognize Type="include" row="22" column="7" Text="User Profile"/>
<Reference recFile="SignOn.rec" timeStamp="14:14:20.293" name="Start"/>
<FieldMap name="default">
<Field name="UserProfile" row="22" column="23" length="8"/>
<Field name="Password" row="22" column="53" length="8"/>
</FieldMap>
</Screen>
</FlyConnector>
When the definition file is loaded and the screen that is identified in the recognition criteria is active then the field map names "UserProfile" and "Password" could be used to set and retrieve the text for the specified fields.
Save the definition file by clicking the "File/Save Definition File" menu option.
