
This walk-through covers how to setup a New Item form for a list that has an accompanying Flynet Web Part which can be used to feed field values to the form from a host application. This can help when a search in the host application is used to pull information on one of the subjects described in the list (such as a client request--you can poke the client information directly from the screen!).
Note that not shown is the InjectFormButton macro, which displays a link in the SharePoint form's top menu which can be used to run a custom script in the ASP.NET application to copy any or all of the contents of the SharePoint form to one or more screens in the host application.
Note: this walkthrough requires SharePoint Designer 2010 to be installed and working with the target site
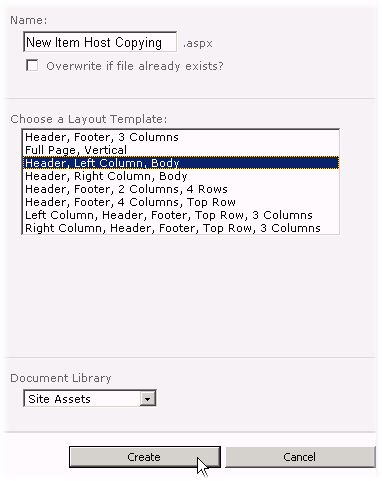
1.Follow the first two steps in the Create Web Part Emulation-Only Page only you will want a different page name and layout. Note that the target is Site Assets, which enables an association step in SharePoint Designer later in the walk-through:
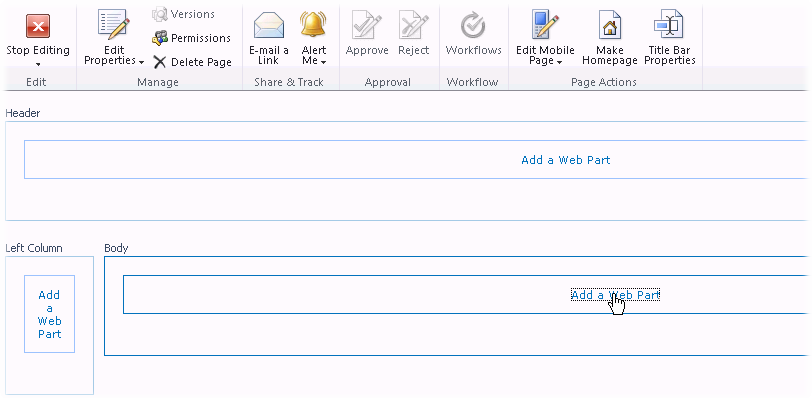
2.The web interface for SharePoint web part pages doesn't provide everything we need, so only the Flynet Web Part will be set on the right column of the page at this time.
3.Stop Editing, and Edit with SharePoint Designer 2010:

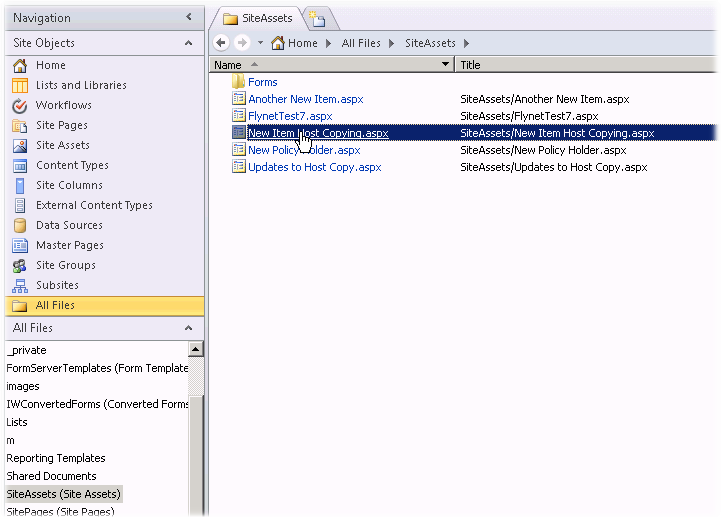
4.SharePoint Designer will load (eventually!) -- Find the All Files Site Object and then click on SiteAssets so that you can open the page that was just created in the Web interface:
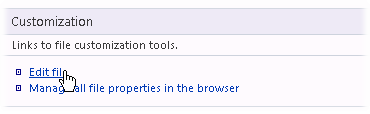
5.Edit the ASPX file clicking in the Customization box middle-left:
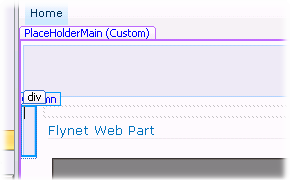
6.The Flynet Web Part doesn't display in the SharePoint designer, so do not worry with its appearance as this is normal behavior. The next step is to add the SharePoint's List New Item form web part--carefully click in the left column's web part zone:
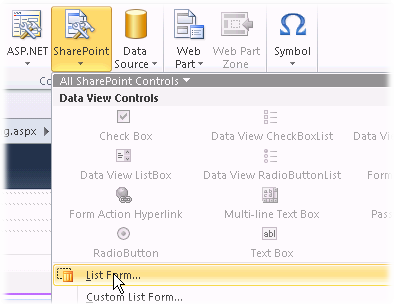
7.Now Click on the Insert tab
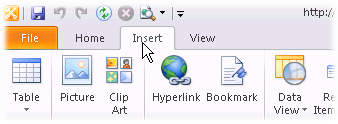
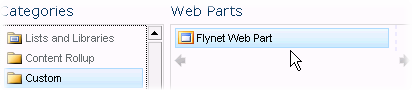
8.And then the SharePoint - Lists Form icon:
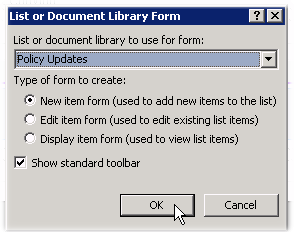
9.Select the New Item form for your List:
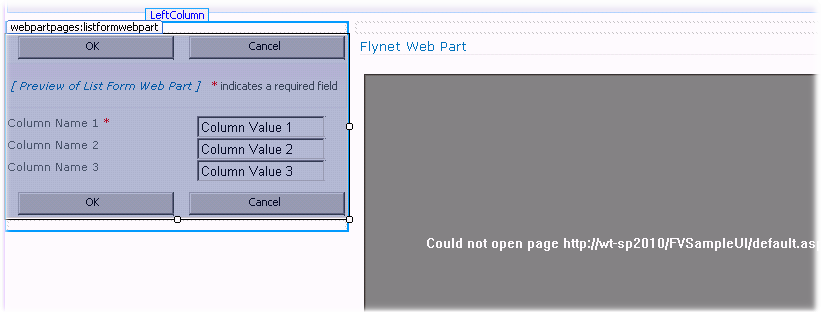
10.Now your page should look like this:
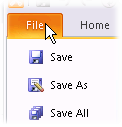
11.File - Save the form...
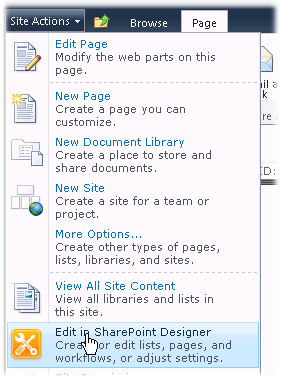
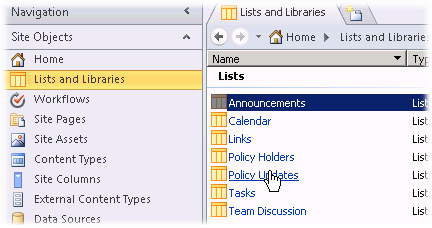
12.And go to the Lists - and open your List in SharePoint Designer
13.Note that by inserting the New Item Form web part, the page created earlier is now in the List's Forms list -- Click to highlight (not open):
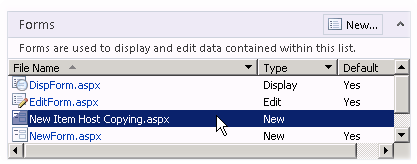
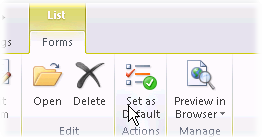
14.And set it as the Default for New Items (alternatively you can set it as a custom action...if you do, use the 32x32 icon _layouts/FVIncludes/gscreen.png for the Custom Action icon).
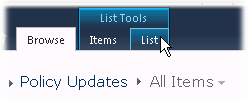
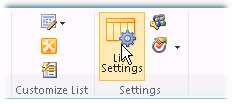
15.Now it is time to minimize SharePoint Designer and return to the SharePoint web interface--navigate to the subject list, click on the List Tools / List tab, and the List Settings:
16.With a two column web part page, there isn't enough horizontal space to use the Dialog Box for item edits--so choose not to use the Dialog box--first, click on Advanced Settings:
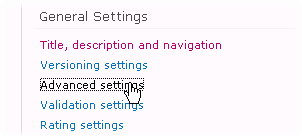
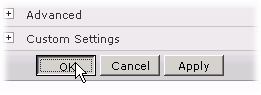
Then, set the Dialog Box option at the bottom-right of the Advanced Settings Page, and click OK to Save:

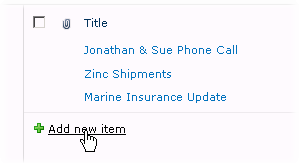
17.Go back to the list and click on New Item:
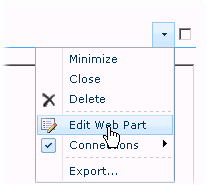
18.Before the form is useful, the Flynet Web Part Form Setter Script needs to be created. Roll the mouse over the top of the Flynet Web Part and select to Edit:
19.Click in the Form Setter Property and on the Editor Launch Button:
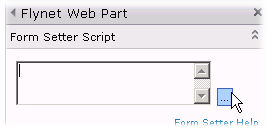
20.This launches the Script Editor, which has its own help--for more information on creating a Form Setter Script, see the Form Setter Script Help
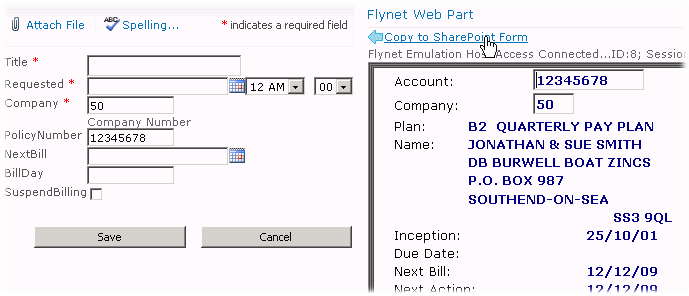
21.The following is an example script that works with the Flynet sample Simulated Host script and Sample Flynet screen definitions. When the AcctSummary screen is visited in the Flynet session, a button/link will appear in the Title area of the Flynet web part; when the user clicks on the link, the named fields are copied to the SharePoint form.

22.Save the Script, then Apply/Save the Web Part property edit panel. You may need to key dummy data into some fields in your new item form as sometimes the javascript in the new item form will prevent a post-back. The dummy data will not be used to create a new item, this is just a quirk in the SharePoint new item form in an edit mode:
23.Exit, return and navigate in the Host application to the trigger screen in the script. This should display your button/link which you can click to copy the data--here is a screenshot of the above script in action:
This ends this walkthrough...
