
This page will guide you through the process of configuring a new Azure AD application that integrates with your Viewer+ FVTerm web application so that Azure AD becomes the security system for users accessing FVTerm.
Requirements
1.You must have a Azure AD Signin that has administrative rights to your Azure AD configuration.
2.Your Viewer+ server must have a DNS name configured in your network--you can start with a server that is not fully accessible on the internet, but will eventually need a full DNS name for the Viewer+ server to configure in the Azure AD management pages.
3.Your IIS server must have an active SSL/TLS certificate. If you do not have a trusted certificate from an issuing authority, you can use the IIS server node's "Server Certificates" page and use the "Create Self-Signed Certificate" action.
4.Your IIS web site for FVTerm must have the https binding activated if you want to test anywhere but the localhost URL--this is in the site's "Bindings" configuration dialog--add https if it is missing.
NOTE-PLEASE CONFIGURE HTTPS (step 4 above) BEFORE ATTEMPTING non-Localhost AZ-AD SIGNONS!
Sign-In to Azure Management Page
Open Azure Management in order to access the Azure AD --
This will open your Azure management as of October, 2021, you first click on the Azure Active Directory Icon-- you may need to click on "more services" to see the Azure Active Directory icon...
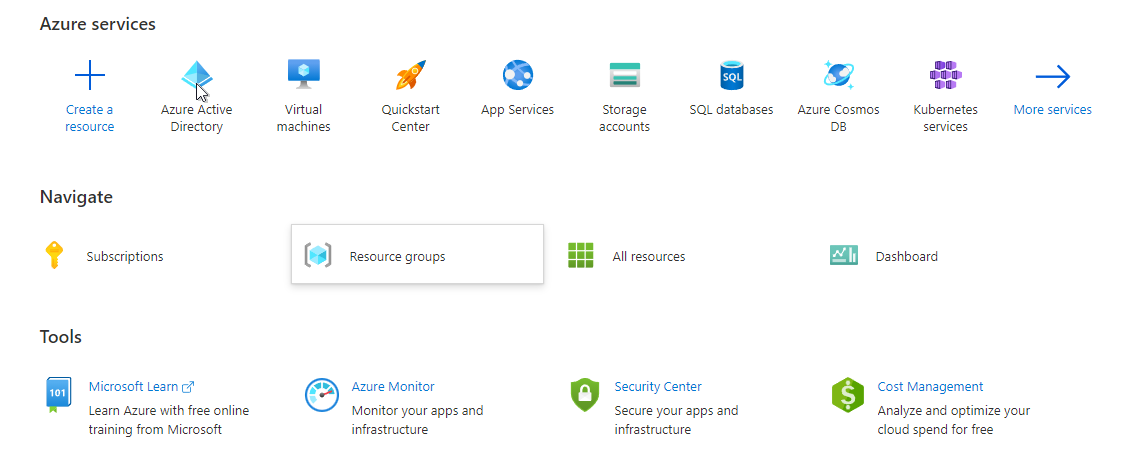
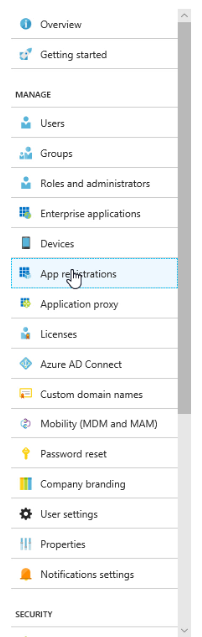
Then select App Registrations in the next "blade":
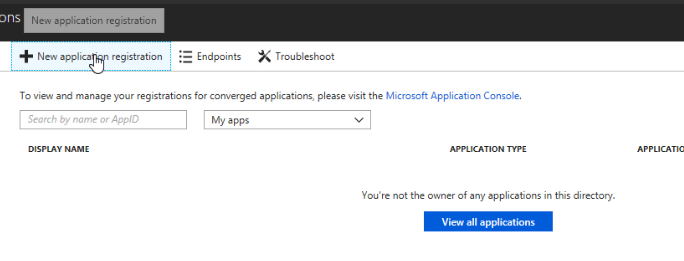
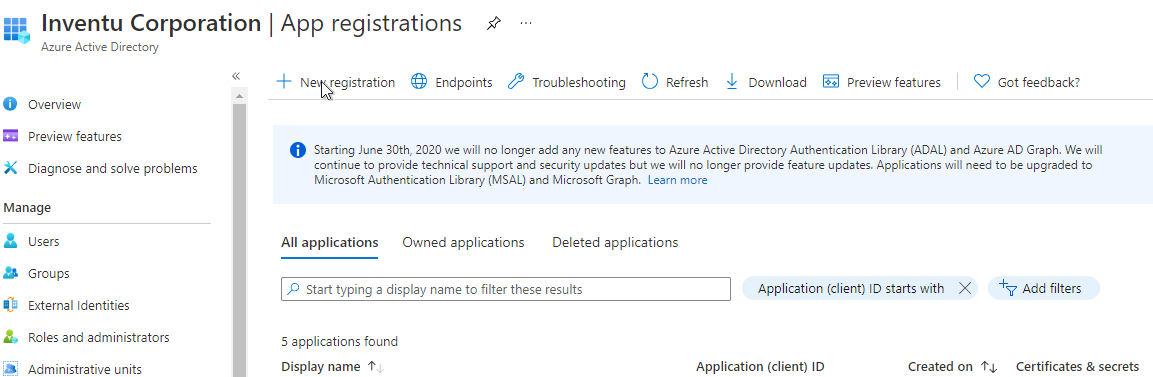
This will display the applications for your organization in the next page (if any) -- Click on Register an application
 :
:
You might also see a list of applications with no "Register and application" button--in this case, click on "New Registration":
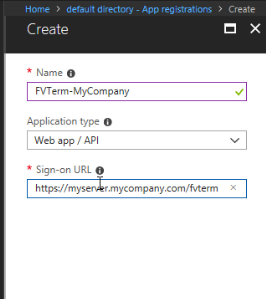
Add a new Application-- use an appropriate name for the servers that will be supporting this application.
Next, enter the signon from requirements # 2 (above) that your users will utilize to access the FVTerm application--if you are testing, enter the test server URL as you will be accessing it.
Remember that it must be HTTPS, unless you see "http://localhost" as a testing option.
For the Redirect URI use just the "FVTerm" for the URL portion, not the full web page url. Once you've entered click on Register...
The application is now created in Azure AD--now you need to create/capture two key text strings that will be used when configuring FVTerm.
First, click on the Add an Application ID URI
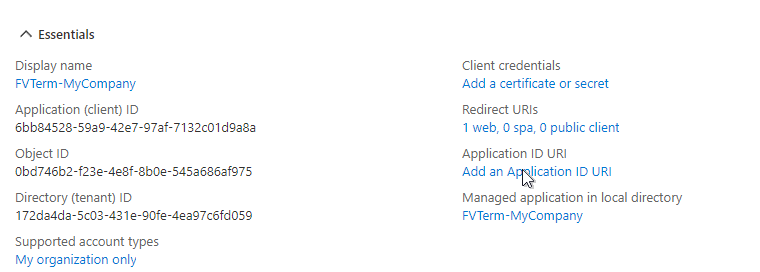
Then, "Set" the Application URI to display a unique string:

This will display a new, opaque string that could be your custom application API--but our experience has shown that it is more reliable to create your own using the domain for your organization, for example:
https://inventu.onmicrosoft.com/FVTermAccess (but use your Azure AD Domain!)
This URL does not need to point to any real server or web address, but by having your Azure AD Domain in it, it has proven more reliable than the "api:{generated guid}" which sometimes results in errors as users sign in.
Copy this Application ID URI to the clipboard and paste to a work text document or other location for later use.
Click on the Header or backbutton to return to the "Essentials"
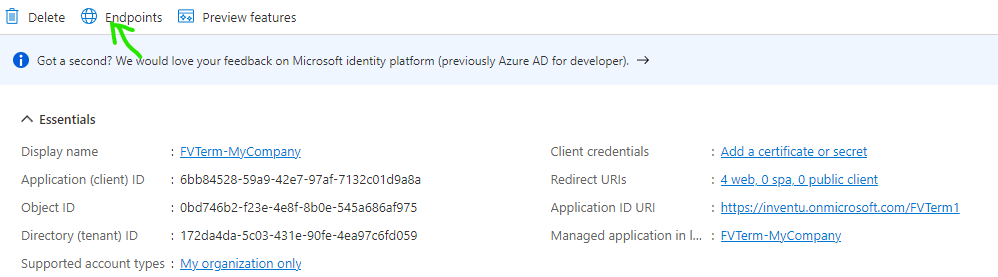
The next step is to obtain the finger prints (also called thumb prints) for the active Certificates used to encrypt and validate the sign-on with Azure AD. This requires you to view the endpoint document for the new application just created and copy the certificate to the clipboard. First step is to grab the URL to access the endpoints XML document...
Click on Overview in the left navigation blade...
Click on Endpoints to access the key URL's about your company, application and so on:
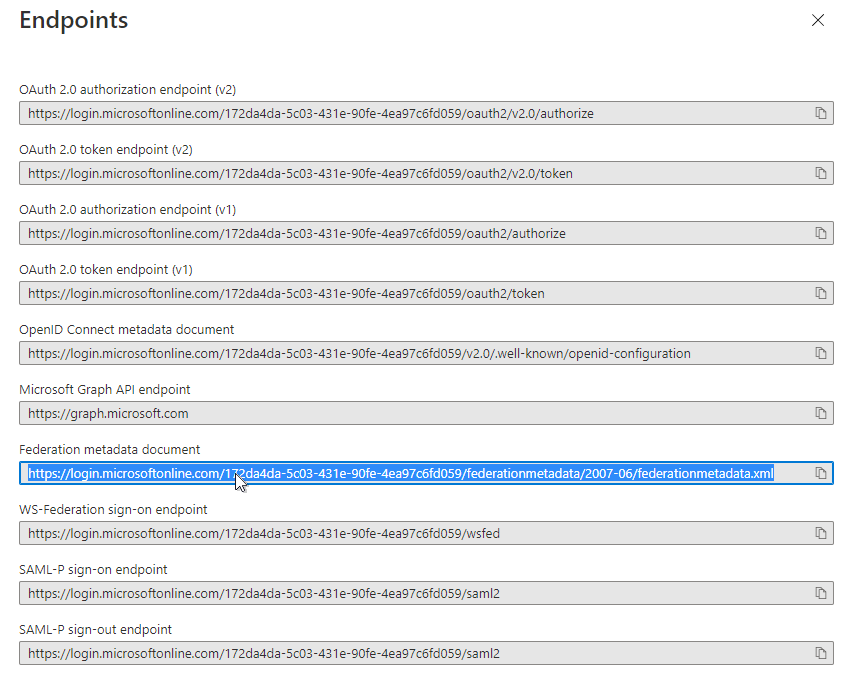
This will display the endpoint URL's -- you are interested in the FEDERATION METADATA DOCUMENT url--copy the URL to the clipboard and/or your scratchpad text document:
Here is an example scratch text file for using the configuration information with the Inventu Viewer configuration page

