This section describes the sample solution provided with Studio.
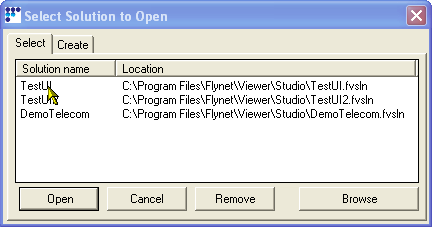
When you first loaded Studio, you were presented with the following dialog--if you did not select the "Test" Solution, please use the File: Open Solution if you care to follow the screens in this section.
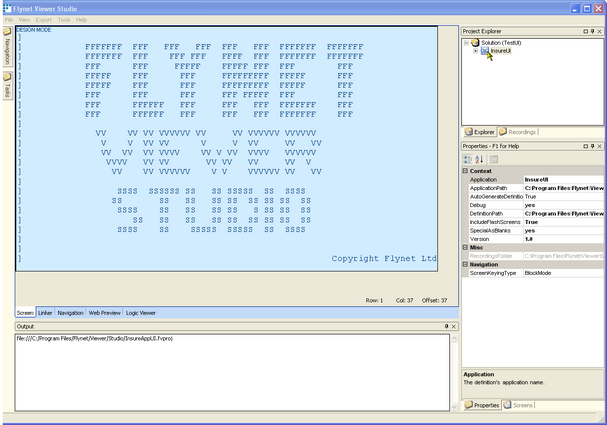
Once opened the Solution and the default screen is loaded as shown below.
Click on the + sign next to the Project to expand the view and show the available screens.

Note that all the Screens defined within the application are now loaded into the Project Explorer Window.
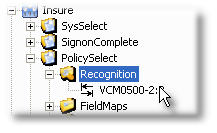
To view the Screen definitions click on the + sign next to the screen.
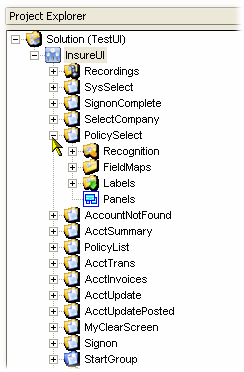
Here we can see that the screen selected has four child nodes:
•Recognition
•FieldMaps
•Labels
•Panels
Click on + again to expand the Recognition tree view
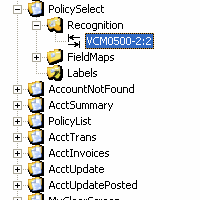
Once selected the element used to recognise the screen is displayed, typically this should be a unique section of text, this is used by Inventu Viewer+ Studio to determine which screen is being processed.
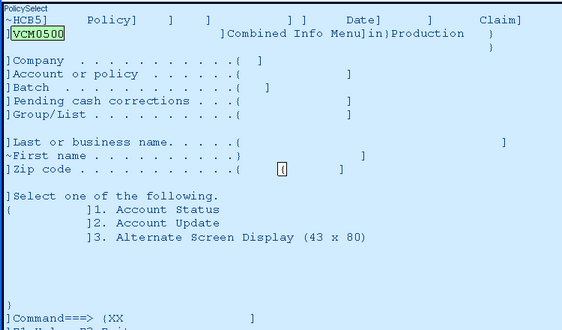
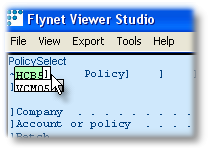
The screen will be displayed in the Main viewing panel of Inventu Viewer+ Studio as shown below.
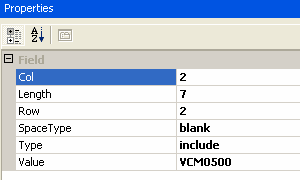
The properties of the Screen recognition definition are displayed in the properties window.
The Screen recognition can now be easily modified in Inventu Viewer+ Studio , suppose you want to make certain that the Policy Select screen text selected will be unique and want to add a further recognition field.
Inventu Viewer+ Studio allow you to simply click on the main viewing panel area and add a new recognition field by dragging your mouse over an area of the main viewing panel.
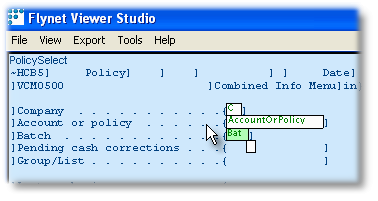
Suppose in the above example you wanted to include the field 'HCB5' shown in the example below as a new recognition field.
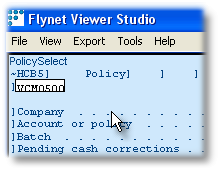
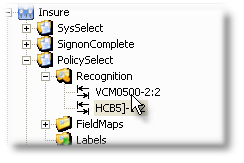
Select the recognition field and as you drag your mouse over the required field to be added, it will automatically be added into the
Project Explorer view as shown below.
The same method can now be used to add new field maps as well,as before select the field maps in the Project Explorer View.
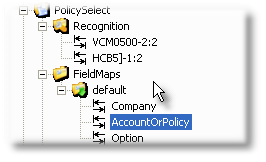

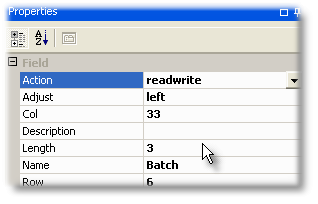
You may want to add the field batch to your screen , simply by clicking on the input area of the field labelled Batch as shown below;
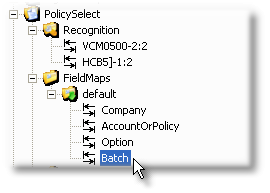
The field has automatically been added to the list in Project Explorer and the name has been taken from the text on the screen, you can now edit
the properties of the field all with a simple click and drag of the mouse.